General

![]() 08h30-09h30 [60 minutes]
08h30-09h30 [60 minutes]
![]() Setting up your Moodle account
Setting up your Moodle account
 During this workshop session we will be setting up your Moodle account. We will be creating you as a 'user', making sure you have 'access' to the correct units and themes and taking your photograph so it can be loaded into your 'profile'. Ideally your username and password are the same as what you used to access the pre-test and survey a few weeks ago. However, these will be finalised now. This session will be a bit messy as each individual will need to be processed separately so once you have a username and password 'login' and complete the activity below.
![]() Activity 1: Complete your profile
Activity 1: Complete your profile
![]() 09h30-09h45 [15 minutes]
09h30-09h45 [15 minutes]
![]() Course Suitability
Course Suitability
 So should you be doing the Kenyan ICT Competency Framework for Teachers Course (KICTCFT)? It is very definitely not for everyone. The course has been designed as a follow-up for the ICT Integration in Primary Education course and builds on knowledge and skills mastered in that course.
The design principles behind this course also assume you have...
Is this you?
![]() Activity 2: Review ICT Integration in Primary Education manual
Activity 2: Review ICT Integration in Primary Education manual
It might have been some time since you did the ICT Integration in Primary Education course or perhaps you have come to this orientation from a different avenue and have not seen those course materials. Access the course manual below and spend 10 minutes reviewing your competencies against the course's objectives.
![]() 09h45-10h30 [45 minutes]
09h45-10h30 [45 minutes]
![]() Course Overview
Course Overview
 So what will this course cover? The KICTCFT course is an intermediate ICT integration course. It builds on what you already know and will encourage you to apply your knowledge and skills in the classroom. It is at the Knowledge Deepening level and will require you to do rather than just know. It focuses on a number of ICT competencies drawn from the UNESCO ICT Competency Framework for Teachers (CFT).
![]() Activity 3: UNESCO ICT CFT & OER
Activity 3: UNESCO ICT CFT & OER
![]() 10h30-11h00 [30 minutes]
10h30-11h00 [30 minutes]![]()
![]() 11h00-11h45 [45 minutes]
11h00-11h45 [45 minutes]

![]() Getting to know OER
Getting to know OER
The KICTCFT has been developed using open educational resources(OER). In this sub-unit we will investigate these resources and see if they might also play a role in the development of your lessons.
![]() Activity 4: What are OER?
Activity 4: What are OER?
![]() 11h45-13h00 [75 minutes]
11h45-13h00 [75 minutes]
![]() Getting to know the VLE
Getting to know the VLE
 Besides the initial orientation workshop this course is run predominantly online through a virtual learning environment (VLE) or platform called Moodle. It is essential that you feel comfortable with the online tools that you will be required to use as part of your studies. This session will be facilitated so make sure you follow his/her instructions and ask questions when things are not clear!
![]() Activity 5: Introductions using the Chat tool
Activity 5: Introductions using the Chat tool
Welcome! You might already have met a few people informally but lets introduce ourselves formally. There is, however, a twist. We will introduce ourselves using the Chat tool.
Was that chaotic! With 50 of you all interacting at the same time it probally was! So how can we use the chat for educational purposes?
![]() Activity 6: Course Expectations using the Forum tool
Activity 6: Course Expectations using the Forum tool
When the facilitator wants you to discuss an issue it is more likely that he/she will use the Forum tool. This tool allows for a more sophisticated discussion. Another advantage is that it is an example of asynchronous communication, that is it's not necessary to have everyone online at the same time. We will use the forum tool to identify your course expectations. What do you think the course will offer you in terms of professional development?
![]() 13h00-14h00 [60 minutes]
13h00-14h00 [60 minutes]![]()
![]() 14h00-16h00 [120 minutes]
14h00-16h00 [120 minutes]

![]() Getting to know the VLE even better!
Getting to know the VLE even better!
Before lunch we looked at a few VLE communication tools, chat, forums and choices, while in this section we will investigate different ways for you to access and submit resources. We will also look at ways for you to do tests online and track your own performance as you work through the programme.
![]() Activity 7: Polls to determine levels of engagement
Activity 7: Polls to determine levels of engagement
Occasionally the facilitator will want to ascertain class trends. Are they ready for the assignment? Do we need a revision programme? etc. He will use a class poll or choice tool to collect this information. Right now he/she wants to ascertain your levels of excitement or apprehension for the work to come.
![]() Activity 8: Submitting assignments
Activity 8: Submitting assignments
In each unit you will be requested to submit an assignment to the unit facilitator. In all cases the assignment will be in the form of an electronic document such as a word processor file or a presentation. These assignment files need to be submitted within the Moodle VLE. Do NOT send your assignment to the facilitator via e-mail. He or she will delete it! We need to track each file so make sure you know how to use the assignment tool.
![]() Activity 9: Quizzes
Activity 9: Quizzes
By now you have already used the quiz tool! The pretest was an example of a quiz. Occasionally the facilitator may require you to do a brief test and the final examination at the end of the course will also utilize the functionality of the quiz tool. Make sure you are familiar with how it works. Try out the example below.
![]() Activity 10: Tracking your own progress
Activity 10: Tracking your own progress
Throughout the course you can track your own progress. To do this we use the Moodle Completion Tool to monitor progress. Access the tutorial below to see how this is done.
![]() 08h30-10h30 [120 minutes]
08h30-10h30 [120 minutes]

![]() Course Assessment Strategy & Setting up Your Portfolio
Course Assessment Strategy & Setting up Your Portfolio
Earlier we mentioned that the TSC will recognize your endeavours on this course and allocate you professional development points. But how will they ascertain your mastery of new ICT in Education competencies? In this block we will unpack the assessment strategy and help you to set up your own online portfolio.
![]() Activity 1: Assessment Strategy
Activity 1: Assessment Strategy
Access the page entitled 'KICTCFT Assessment Strategy' below to learn more about assessment opportunities and mark allocations.
![]() Activity 2: Setting up your e-portfolio's structure
Activity 2: Setting up your e-portfolio's structure
![]() Activity 3: Setting up your e-portfolio's layout
Activity 3: Setting up your e-portfolio's layout
![]() 10h30-11h00 [30 minutes]
10h30-11h00 [30 minutes]![]()
![]() 11h00-11h10 [10 minutes]
11h00-11h10 [10 minutes]
![]() Understanding Plagiarism
Understanding Plagiarism

Plagiarism is the act of taking another person's writing, conversation, song, or even idea and passing it off as your own. This includes information from web pages, books, songs, television shows, e-mail messages, interviews, articles, artworks or any other medium. Whenever you paraphrase, summarize, or take words, phrases, or sentences from another person's work, it is necessary to indicate the source of the information within your document using an internal citation. It is not enough to just list the source in a bibliography at the end of your paper. The KICTCFT will not tolerate plagiarism and the facilitators will take strong action if it is detected. In this sub-unit we will investigate a tool to use to ensure that your submission does not fall fowl of the 'no-plagiarism' principle. (More... here)
![]() Activity 4: Detecting Plagiarism
Activity 4: Detecting Plagiarism
![]() 11h10-12h00 [50 minutes]
11h10-12h00 [50 minutes]
![]()
 Using your phone and tablet to access the KICTCFT
In this session we will look at how to set up your phones and tablets to support your KICTCFT studies using both Moodle Mobile and Whats App. We will also complete a tutorial on how best to use the photo, video and audio features of your phone to submit media as part of your assignments.
![]() Activity 5: Setting up Moodle Mobile
Activity 5: Setting up Moodle Mobile
Moodle Mobile runs on three of the main platforms; Android, iOS and Windows Phone. The following are the steps to follow when installing the application on these platforms;
![]() Activity 6: Uploading Content - Video
Activity 6: Uploading Content - Video
For some activities in this course you are required to upload assignments which can be in the following formats; images, videos, PDF etc. But, from the Mobile Application this will not be possible, it will redirect you to the browser from where you can be able to access the files that you have in your phone. This might bring up problems with regards to file type for media files i.e. videos and audio, also the size of the files. This then means we should change the format and the size. To do this we need the following applications;
![]() Activity 7: Uploading Content - PDF and Word Documents
Activity 7: Uploading Content - PDF and Word Documents
Some assignments will require that you upload PDF and Word documents, the procedure for doing this is the same as the one for videos, you will be redirected to the browser from where you can be able to choose the file you wish to submit.
Note: It's advisable to submit assignments in PDF format so to avoid issues with format.
To be able to smoothly study online using your phone or tablet here are some applications that you may need to have installed on your phone. The document below gives you a breakdown of these apps.
![]()
 Activity 8: Course Community Chat - Whats App Group
You have been interacting face to face during this orientation course. To continue collaborating during the online phase, we need to form a WhatsApp group. In this group you will required to observe online etiquette and chatiquette that you have learnt.
![]() 13h00-14h00 [60 minutes]
13h00-14h00 [60 minutes]![]()
![]() 12h00-13h00 [60 minutes]
12h00-13h00 [60 minutes]

![]() Access the OpenSIS School Management System
Access the OpenSIS School Management System
We will use this session to access the OpenSIS School Management System and ensure that everyone has the correct permissions to complete activities in Unit 9 on School Records. By the end of this sub-unit make sure you have the following information tucked away for later reference.
![]() Activity 9: Creating a School in OpenSIS
Activity 9: Creating a School in OpenSIS
A version of OpenSIS is running on the KICTCFT server and we need to customise it so that there is place in it where your school can keep its records. Use the link below to access OpenSIS.
![]() Activity 10: Creating a School OpenSIS Administrator
Activity 10: Creating a School OpenSIS Administrator
Lets create you as the dedicated administrator for your school's database.
NB: Keep the record of your username and password as these will be essential to complete lesson 9!
![]() 14h00-15h00 [60 minutes]
14h00-15h00 [60 minutes]
![]() Who You Gonna Call? --- "Ghostbusters!"
Who You Gonna Call? --- "Ghostbusters!"
In this session we will identify support personnel who you can contact if there are problems either academically, administratively or technically. It is important to call the correct person.
KICTCFT Course Co-ordinators for strategic issues relating to the KICTCFT and its role as a teacher’s professional development option and teacher issues:
Ms Cecilia Wakahiu, Head National ICT Innovation and Integration Centre, Ministry of Education, Science & Technology: cwakahiu@education.go.ke / cwakahiu@gmail.com
Ms Anne Njagi, Assistant Deputy Director TSC ICT department, Teacher Service Commission: anjagi@tsc.go.ke / anwagi39@gmail.com
Jaco du Toit, Communication and Information Adviser, UNESCO: j.dutoit@unesco.org
KICTCFT Course Administrator for Moodle permissions, changes of participant’s e-mail, broken links, missing documents in the course.
Ms Ivy Obonyo, Teacher Service Commission: ivy.obonyo@tsc.go.ke
KICTCFT Course Lead Facilitators for issues to do with teacher support, absenteeism, negative behaviour by participants, application for extensions etc.
Online facilitators have been assigned to support you through each of the course's themes. Make sure you identify the appropriate online facilitator for your group. The full facilitation team includes:
Group 1
Group 2
Group 3
Group 4
Group 5
Group 6
KICTCFT Course Moodle Support for issues relating to the platform such as rebooting the server and/or requests for additional online functionality etc.
Mr Andrew Moore, Neil Butcher and Associates, Johannesburg: andryn@iafrica.com
![]() 15h00-16h00 [60 minutes]
15h00-16h00 [60 minutes]
Facilitated by Anne Njagi from the Teachers' Service Commission (TSC).
Simon Kavisi for TSC from Andrew Moore on Vimeo.
![]() 08h30-13h00 [250 minutes]
08h30-13h00 [250 minutes]
![]() Access and Complete the First Unit
Access and Complete the First Unit
In this session we will work as a group to complete the first unit. The methodology used will be a blended learning approach where we will work face to face but interact using the Moodle platform.
![]() Activity 1: Complete Unit 1 on ICT in Education Policy
Activity 1: Complete Unit 1 on ICT in Education Policy
![]() 13h00-14h00 [60 minutes]
13h00-14h00 [60 minutes]
![]() 14h00-14h45 [45 minutes]
14h00-14h45 [45 minutes]
![]() Accessing the KICTCFT when you are Offline
Accessing the KICTCFT when you are Offline
What happens if your connectivity fails you? In this sub-unit we will look at how you can access the KICTCFT materials when the Internet is down. While you will not be able to interact with your peers or online facilitator you can access the course materials.
![]() Activity 2: Accessing KICTCFT Offline
Activity 2: Accessing KICTCFT Offline
![]() 14h45-15h00 [15 minutes]
14h45-15h00 [15 minutes]
![]() Accessing the Podcast program
Accessing the Podcast program
One of the units requires you to create podcasts (audio files) and we will use an open source program to achieve this called Audacity (http://www.audacityteam.org/). It is a good idea to download the progam while you are here at CEMASTEA as the download is large one and will eat up your data if you need to download it later. Alternatively make sure you can access the program from the flash disk you received in the previous session.

![]() Activity 3: Accessing Audacity
Activity 3: Accessing Audacity
![]() 15h00-15h20 [20 minutes]
15h00-15h20 [20 minutes]
![]() Enhancing Accessibility to the KICTCFT Course
Enhancing Accessibility to the KICTCFT Course
How can you improve accessibility to the course? Should you have certain personal challenges, such as being visually impaired, in this sub-unit we will investigate accessibility options.
![]() Activity 4: Accessibility Options
Activity 4: Accessibility Options
![]() 15h20-16h00 [40 minutes]
15h20-16h00 [40 minutes]
![]() Feedback on the Workshop
Feedback on the Workshop
Do you feel you are ready? Prepared? Was the workshop effective in providing you with an orientation to the VLE and the course in general? Please give us some feedback so that we can improve the workshop.
![]() Activity 5: Workshop Feedback
Activity 5: Workshop Feedback
![]() 16h00-16h30 [30 minutes]
16h00-16h30 [30 minutes]
KICTCFT Course 1st Cohort (CEMASTEA Feb-May 2015)
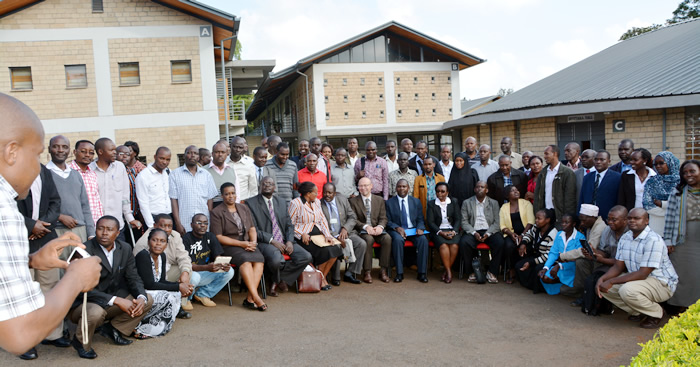
KICTCFT Course 2nd Cohort (CEMASTEA Jan-May 2016)

KICTCFT Orientation Workshop Programme & Resources by Ministry of Education Science and Technology, Kenya
is licensed under a Creative Commons Attribution-ShareAlike 4.0 International License.